
Getting closer to wildlife requires a mix of solutions. It’s not just about getting close enough to fill your frame with whatever lens you have; there are safety, legal, and ethical considerations. For many of us, accessibility is an issue as well. Physical mobility limitations and budget both affect how close we can get to wildlife. Regardless of the challenges, there are some great ways to get closer to wildlife within your (and the wildlife’s) limitations.
How to Get Closer to Wildlife
Learning how to get closer to wildlife for photography boils down to knowing your subject’s behavior, your own limitations, the laws and regulations that apply, and choosing the right gear to make up the difference. Preparation is the majority of the battle.
What to Wear
Camouflage might seem like the perfect option. However, seeing someone walking around in full camo might make folks nervous in some locations.
- Camouflage: Consider camouflage clothing, or even ghillie-style (camouflage with 3D elements that resemble brush) to break up your silhouette and put wildlife at ease. In an area where hunting is possible, be sure to wear the required amount of blaze orange for safety.
- Dress your camera: Don’t forget your camera and lens. Use a camo camera sleeve to help disguise your camera.
- Neutral colors: If you don’t have camo clothing, use neutral colors that match the environment.
When to Go
Arriving at a popular spot before the wildlife makes getting closer much easier and lets you set up equipment without scaring anything. If you are going to a new-to-you wildlife hotspot, scout ahead or ask folks who photograph there regularly where the animals are at certain times of day.
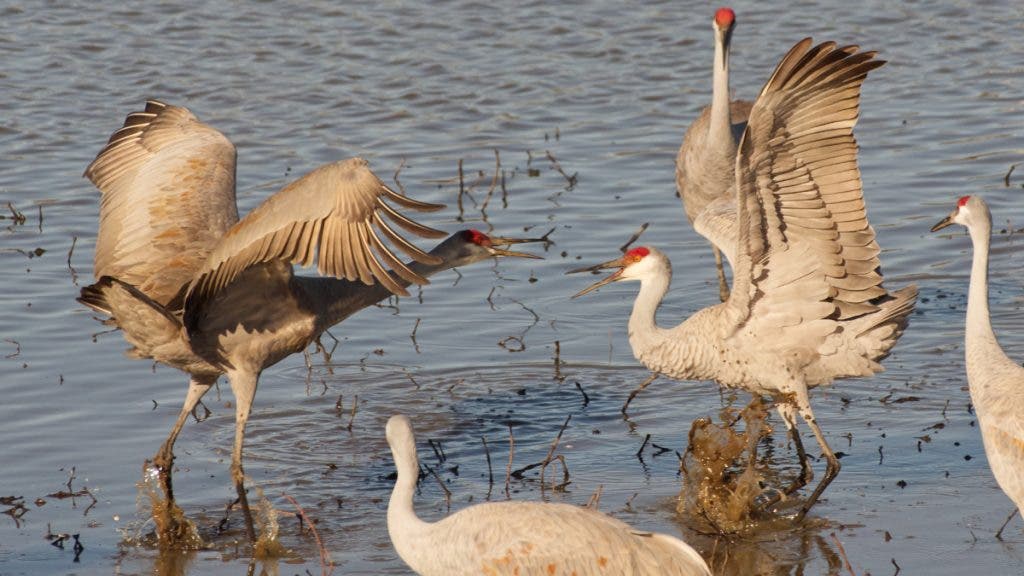
In general, you’ll want to arrive just before sunrise or a few hours before sunset. Keep in mind that the early morning rush to find food and move from nesting to foraging grounds is generally more chaotic, and wildlife (especially birds) are much more skittish early in the morning as they move from roosts. Once they’ve been at a spot for a few hours, they start relaxing, so have patience as you wait for them to settle in and get comfortable with their surroundings.
Another consideration is the time of year. While events like the deer rut and salmon runs offer great behavior shot opportunities, animals are often more reactive, and safety is a greater concern for all during those times.
Stay Hidden
Staying hidden is rule one in keeping your subject relaxed and behaving normally, so you can get those great behavior shots. The best ways to stay hidden when photographing wildlife are:
- Use a blind: Blinds won’t be allowed everywhere, but a portable half-shell blind can make it much easier to stay hidden and comfortable.
- Use your car: Often nicknamed a rolling blind, it’s a great option for getting closer to wildlife when location and terrain allow. It’s also the number one accessibility aid if you have mobility concerns. Most wildlife is at least somewhat habituated to vehicles and doesn’t flee as quickly from them. Improve the effectiveness by adding netting over your window opening to reduce your visibility to the animal when stopped and shooting.
- Use natural cover to your advantage: Find a bush, high grass, or even a tree trunk to disguise your approach and presence from the subject.
- Disguise your smell: Don’t use perfumes or scented detergents when heading out for wildlife photography.
- Use a quiet camera: DSLRs will always be my favorite because I prefer actually looking through the lens to a digital viewfinder, but mirrorless cameras are champions at reducing noise that can frighten animals.
How to Approach Wildlife
If you need to actively move closer to wildlife you didn’t set up for ahead of time, there are some easy ways to get closer. Just remember that safety trumps photos, and don’t get too close.
- Watch for tells: Learn basic animal behavior and use that knowledge to spot signs of stress and upcoming behavior. You want to move when the animal isn’t on high alert.
- Go slow: Fast movement is the fastest way to spook your subject. Move slowly and plan your path before you start.
- Zig-zag: If you approach an animal directly, it will feel threatened quickly. Approach indirectly by using a wide zig-zagging pattern back and forth across the direct path, so it looks like random wandering to the subject.
- No eye contact: Don’t stare at your subject as you move. Focus on a point just to the side of it and use peripheral vision. If you make eye contact, your subject is much more likely to see you as a threat. This rule goes for your camera as well. Most animals treat the camera lens like a big eye. Don’t raise your lens until you are ready to shoot.
- Stay low: If you look smaller, you’ll trigger less fear. Stay low when moving and don’t be afraid to get dirty by belly crawling.
Legal and Ethical Wildlife Photography
Federal and state laws, as well as guidelines at nature facilities, affect how you can approach wildlife for your safety and theirs. While laws vary by location, they generally set limits on how close you can get to wildlife and prohibit feeding, touching, or harassing the wildlife.
Laws and Guidelines
In the U.S., major laws include the Bald and Golden Eagle Protection Act, 36 CFR § 2.2 governing national parks, the Endangered Species Act, and the Migratory Bird Treaty Act. Always check with any facility for site-specific rules as well.
Likewise, don’t trespass, jump gates to closed areas in refuges, drive into areas closed to motorized vehicles, or assume creeks are open to walking through, as access rights vary by state.
Avoiding Bad Behavior
Those rules and guidelines are there to keep everyone safe. The International League of Conservation Photographers (ILCP) and other wildlife groups have ethical standards lists to help guide you in tricky situations. Some of the most common mistakes photographers make include:
- Damaging the environment: Don’t remove plants or brush for better sightlines. Removing camouflage from a den or native plants can have long-lasting effects.
- Getting too close: Some species, like Whooping Cranes, have defined legal limits to how close you can get. Others, like bears and buffalo, might maul you or worse if you get too close.
- Baiting: Most people are ok with birdseed or deer feed (where it isn’t legally prohibited). However, baiting is generally a bad idea for the health of the animal. Once an animal is conditioned to approach people for food, dangerous interactions can occur.
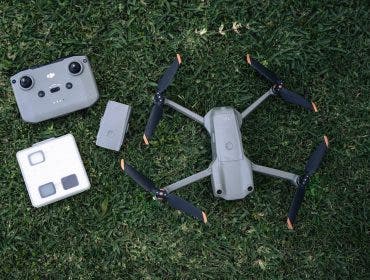
Choosing the Right Camera Gear for Getting Closer to Wildlife
When getting physically closer to wildlife isn’t an option, it’s time to consider upgrading your camera gear for more reach. There are two main ways to increase your camera’s reach. One is with better lenses, and the other is with more data that allows heavier cropping.
Heavier cropping of your images isn’t usually the best solution. Still, a camera body that has more megapixels and better noise (grain) control allows more cropping than older models. Moving to a full-frame mirrorless body often gets you more megapixels, better noise handling, and less noise when shooting—for example, the 45.7 megapixel Nikon Z8, or the 62.5 megapixel Sony Alpha a7CR.
Longer lenses and teleconverters are the preferred options for getting close-up nature shots without physically approaching wildlife. Teleconverters magnify the reach of specific lenses at the cost of a few F-stops. Zoom lenses give you room to adjust without changing lenses as wildlife moves, like the Nikon NIKKOR 180-600mm. And prime lenses like the Canon RF 800mm give you reach and sharpness.
Combining gear, approach, and safety awareness will put you well on your way to great wildlife photos.
Check out this video by Adorama Writer and Host Peter Dam